Downloading is taking a file (in this case an image) from the distant site (SL) to the local site (your computer).
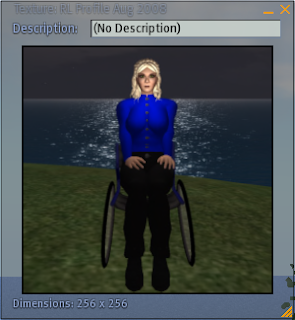
To download an image from SL, open it from your inventory. This should get you a window like the one in the image to the right.
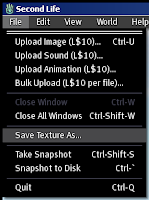
Then go up to the File menu on the left of SL's top toolbar. You should see 'Save Texture As...' as an option. Select that. You can now select where on your hard drive you want it, and SL will download the texture to your machine.
Upload
Uploading is taking a file (in this case an image) from your local machine to the distant machine (SL).
You must have at least 10 Lindens in your account to upload. If you don't have the money, the upload options will not be available in your File menu.
If you do, you will see 'Upload Image', 'Upload Sound', 'Upload Animation' and 'Bulk Upload' listed in your File menu. All uploads cost 10 Linden per file.
Select the appropriate option (clothing, skins, textures and photographs all count as images), and you will get a dialog asking you to choose the file. Find the file in your hard disk and click on Open.
Uploading an image provides a window which shows you the image, with a dropdown menu allowing you to preview it as a clothing item. If you are happy with the image, select Upload. All uploaded images are of type texture: to get a type 'snapshot', see the special case below.
Uploaded images appear in your Textures folder.
Uploading a sound provides a window which lets you select the bitrate. Unless you specifically want something else, stick with the default there.
Uploaded sounds appear in your Sounds folders.
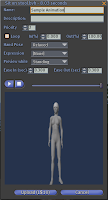
Uploading an animation is the most complex, the preview screen for the animation doesn't just provide a preview, but controls most of the animation options. At some point I will write a tutorial about making SL animations, and I will discuss this upload screen in that tutorial (and link to it from here).
Uploaded animations appear in your animations folder.
Bulk upload lets you upload any file type, but without the previews. I don't recommend it for animations, but I frequently use it for images.
Bulk uploaded files appear in the folder for their type.
Special case: Snapshots
Snapshots - or photographs - can be either saved to your hard drive or uploaded direct to SL.
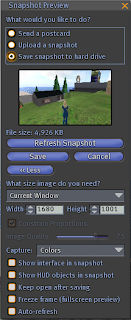
Snapshots only get the photograph icon if they're uploaded directly to SL from the snapshot screen, in all other cases they have to be uploaded as images and are treated as textures.
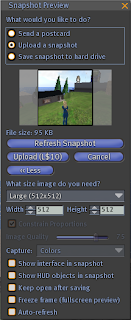
You determine whether to save your snapshot to your hard drive, upload to SL, or send to another person (via email) with the three radio buttons at the top of the snapshot preview.
The options below vary depending on which radio button you choose. Saving to your hard disk provides the same file selection browser as downloading a texture. Upload will upload the snapshot to SL, costing you 10 Linden and giving you the image in your 'Photos' folder with a photograph icon. 'Send' will ask for your email address and send the photograph to the email address provided.
If you're taking a lot of photographs (such as modelling clothing) and want to save them all to your hard drive, use CTRL-`. (The ` is the form of apostrophe under the tilde ~ key in the US-style keyboard.)


2 comments:
Hi, any idea how I can solve the problem of downloading from SL a .tga file and when I open it in Photoshop, it looks totally warped with a strange background. I tried to copy the layer I wanted into a new file to get the transparant background, but that did not work either!
HELP! ;-)
Hm.
I use the Gimp, and have never personally had that problem. Would you mind emailing me the texture?
seshatczeret AT gmail DOT com.
I'll take a look and see if I can figure out what happened. Also, drop me a copy of the texture in-world, so I can try to duplicate the problem.
(If it's proprietary, just grab me in world and show me, rather than handing it to me.)
Post a Comment