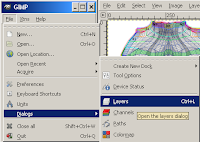
If your Layers dialog is missing, re-create it with Dialog->Layers from your Tutorial Shirt window, or File->Dialogs->Layers from the main Gimp window. You will need it for this lesson.

Open your Blended Upper Body Template.xcf file - or whatever you chose to call it. Over time, you'll probably add layers to it. Save it as Tutorial Shirt.xcf. (At least, that's what I'll call mine. You can call yours whatever you want to.)
There's an awful lot of information in the Blended Templates (now Tutorial Shirt) file. Let's turn some of it off - it's too much to deal with at this stage. Go to your Layers dialog.
Click on the eye symbol for each layer, and watch the Tutorial Shirt window. You'll see how each eye symbol you turn off makes something vanish from the Tutorial Shirt window.
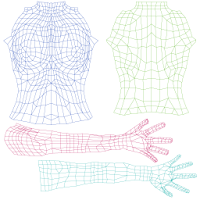
Clothing and skin designers make a lot of use of this selective visibility of layers. For now, turn off everything except 'UVs' and 'Backdrop'. What's left should look like the image to the left.
Our goal is to make a new layer, and on that layer, cover each of the UV grids with our favourite colour. Then we'll turn off every other layer, and save only our coloured layer as the 'texture' for our shirt. We'll also give the shirt a nice neckline, and sleeves only partway down the arm.
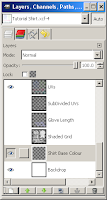
So let's start by making a new layer. We've done that already, to make the backdrop. This time, we don't want a white background to the layer, we want it transparent. And we want a different name. So back to our friendly little page icon we go. I'm calling my layer 'Shirt Base Colour'. Click the 'Transparency' option under 'Layer Fill Type'. Leave the 1024 * 1024 layer size.
Move this layer so that it's under the UVs and above the background. Make sure this layer is selected: as in, the blue bar (when the layer window is selected) or gray bar (when its not) is on the Shirt Base Colour layer.
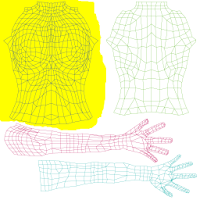
Use a selection tool (I used free select) and circle the entire blue UV layer. Go to the Colours (or Colors) dialog, and pick a colour you like. Or for this tutorial, use bright yellow because it shows up with each UV grid colour. Fill the selection with the bucket fill tool.
If your Colors dialog is missing, go to File->Dialogs->Colors, like we did with the layers.
Now to make the neckline for the front. Zoom in. View->Zoom->200%. (Why 200%? Because it lets the whole neckline show on my monitor. If your monitor shows the whole neckline at a different setting, feel free to use it.)

As the clearly visible bust shows, the blue UV grid on the left is the front of the body, so get the neckline of the blue UV grid into the middle of the window.
We could use any selection tool to get the yellow off our neck. We could even use the eraser. But I'll show you a very handy tool called the Paths tool. I've circled it in red for you.
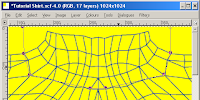
Select the path tool, then click around the neck where you think it would look good. I find that using the intersections of UV lines works very well: these are points which don't change much over different avatar shapes. Make your first and last clicks up near the top of the screen, rather like I did.
Only experience (and lots of tries on your previewer) will let you decide which particular intersections of UV lines will have which effects - and when to ignore the UV lines and just place a feature precisely where you want it.
If you make a mistake with the placements, you can drag the little circles around. You might find as you do that that two little squares appear out of one (or more) of the circles. That's another nifty feature of paths - those squares let you make curves, rather than straight lines. You can get those squares out of any of the circles: select a circle by clicking on it, hold the control key down, then click in the circle and pull. You'll get two little squares (called 'handles').
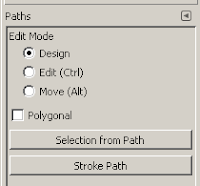
Play with the path tool until you have a nice neckline. (You may need to switch between 'design' and 'edit' in the tools menu; design lets you drag circles around, edit seems to control the handles.)
Select the last circle, up at the top of the screen, then click on 'Selection from Path' in the tools menu at the bottom of the Gimp main menu. This makes the whole area above the neckline selected, and you can just cut it away (Edit->Cut or control-C).
If the Paths toolkit (which includes Selection from Path) isn't there, use File->Dialogs->Tool Options to re-create it.

Repeat the whole process for the back of the shirt, and colour both sides of the arm. Unfortunately, this is one arm - there's no opportunity for asymetrical sleeves in texture clothing in Second Life. This arm represents both of them.
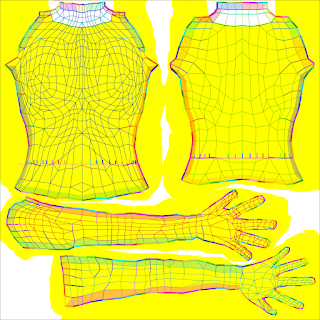
Now we come to one of the big not-a-secrets of clothing design in Second Life. How do we match the front and back necklines?
Our front neckline crossed the shoulder seam at the second UV intersection from the shoulder, so our back neckline should cross at the same place. Another option is the match lines and seam edging lines that Robin and Chris have so generously given us.
The image is of the shirt at this stage, with both Robin and Chris' matching tools showing.
We're going to use match lines to help us with the sleeve, too. 'Edge Matching Guide' from Chris Midnight's templates is my favourite for this task. Robin's tool is 'Match Lines'. Make one or both of them visible by clicking the eye column in the Layers dialog.
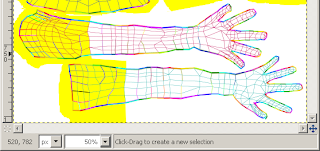
Make sure you still have your 'Shirt Base Colour' layer selected. Decide how long you want the sleeve to be. Find one of Robin's match lines or the end of one of Chris' match colours that's about at that point, on each side of the top arm. Use a selection tool (paths are good) and get rid of all the yellow from those points to the end of the arm on that arm.
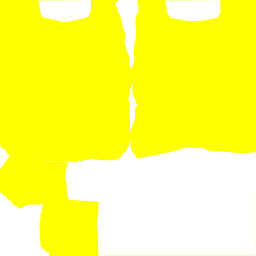
The two sides of the arm that are closest to each other are matches, and the two sides that are furthest from each other are matches. Find the corresponding match lines/end of a match colour on each side of the bottom arm. Use a selection tool and get rid of the yellow below those points on the bottom arm too.
Turn off every layer except your colour layer. Even the backdrop. Save your file as a .jpg and upload it to the UVMapper. (See part one if you've forgotten how to do that.)
Your tutorial shirt should look something like this. Use the zoom, hand and rotate tools (under Select->Mode) to make sure all your edges match. If they don't, go back to the Gimp and add a couple of pixels to the shorter surface, or remove a couple from the longer.

On the arms, it can be annoyingly difficult to be sure which arm edge corresponds to the edge on the tshirt. I put a coloured dot on the part I want to check, re-upload and look for the dot.
Repeat the process of tweaking the pixels until all the edges match to your satisfaction, then fill any coloured dots in with the proper colour.
If you want to use my advanced tutorial on using textures, this is the stage at which you put the texture in.
Now - finally - it's time to take it into Second Life. But let's not be hasty, we'll take it to the beta grid. First, we should save it in something better than a jpg.
Save your shirt. Save a backup, just in case.
Once it's been saved at full size, use Image->Scale, and scale it down to 512 by 512. The Second Life viewer will do this anyway, and Gimp is better at scaling than the viewer is. Also, 1024 * 1024 is four times larger than 512 * 512: since that extra size won't ever be seen, use the smaller one.
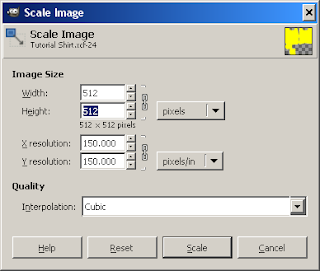
Then File->Save a copy, and save it as a Targa, or a .tga. Untick 'RLE compression' and 'Origin at bottom left' - we don't need either of these.
Another option is to save as a .png. PNGs are smaller than Targas, but some people have problems getting transparency with them. Most of the options don't matter much, but be careful with 'Save background color'. If you want a transparent background (to show skin above the neckline and below the sleeve hems), make sure this is NOT ticked. For anything where you don't want transparency, make sure it IS ticked.
Edit->Undo the scaling once you've saved the copy, so you don't forget and save it at its scaled-down size. If you do mess up, just undo back until it's 1024 again and save at the larger size. Undo is better than scaling it back up, because each scaling is slightly lossy. With the simple outfit we have this time, it doesn't matter much, but a fancy outfit could lose a lot of detail.
(If you can't undo back till its 1024 again - well, that's why you saved a backup before you scaled it, right?)
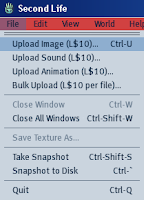
Now go into the Second Life beta, and upload the .tga or .png. Make sure it's the beta grid - don't upload it to the main grid (and cost yourself 10 Lindens) until you've checked it in the beta grid.
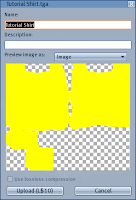
Upload with the File->Upload Image dialog. It will show you a preview of the image, and warn you that uploading will cost 10 Linden. Don't worry about that: the beta grid linden are almost infinite. (But nothing on the beta grid can be trusted to last, which is why they're effectively infinite.) The preview will have a checkerboard background if it's transparent. Accept the upload.
On the beta grid, you will probably be in a public place. If you're female, make sure you're wearing some sort of undershirt: even if it's just one you make with the sliders. Like the one I'm wearing in this picture.
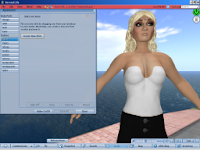
Go into appearance mode. Select shirt. Use 'Take off' down at the bottom of the appearance mode dialog to remove any shirt you're currently wearing. (Thus, the undershirt.) Press 'Create new shirt'.
There are two squares. The top one is called Fabric. Press that one, and in the texture dialog which it summons, find the shirt. Save it as whatever you want to - Tutorial shirt will do - and you're done!
You can move the sliders around and see what effect that has on your shirt, and you can choose different colours in the colour window too, just to explore your options.
When you're selling, this is a good time to set permissions on your new piece of clothing. It's a good habit to get into now, so go into the inventory, find your shirt (probably at the bottom of your clothing folder), and right click on it. Select properties, and then down at the bottom, make sure the permissions you want are the ones that are ticked. Don't have both 'copy' and 'transfer' ticked unless you want it to be a freebie.
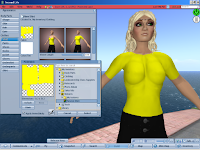
This is where I say 'the rest is art'.
Move on to part 3, Highlights and Shadows.


No comments:
Post a Comment