Making leather, I open up the Gimp, then a copy of the templates I use (a blend of Chip Midnight's and Robin (Sojourner) Wood's), and make a new layer.
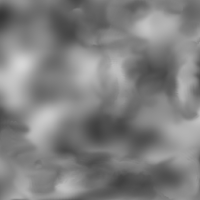
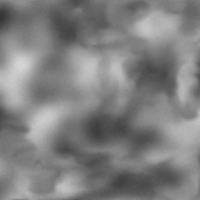
On that new layer, I generate clouds and desaturate them so they are shades of grey. This will be the lighter and darker patches in the leather. Next, I do some texture edge matching.

Why match the texture edges? So the clothes look right across the mesh seams. If you look at the clothing UV maps, you'll see that the avatar bodies have separate front and back pieces. In the process of making the body (or the clothing over that body) SL puts the pieces together. If you leave the texture edges unmatched, you'll have a very distinct and obvious line where the front and back pieces meet. Try it by saving your clouds as a jpg and loading them into UVMapper. (I mentioned UVMapper in making the Brigid set.)
This part is annoying and tricky. I pull the UV maps up to above the leather, but keep the leather as the layer I'm working on. Then, section by section, I compare the front mesh to the back, and recolour the edge of the back to match the edge colour of the front.
It doesn't matter how you do it: using the dropper and the pencil, paintbrush or spray-painter; using cut and pastes; anything that works for you. Just be sure to recolour beyond the edge of the UV map, because sometimes that extra bit of texture does get used.
Once you have the edges recoloured, your work is pretty obvious: there are these huge stripes that don't blend in. Instead of having ugly mesh-seams on your lovely garment, you'll have ugly stripe-edges. So grab your favourite blending tool - the smudger, the blur, even the dodge-and-burn. Maybe the spray paint and the dropper. Whatever you like to use. And blend those ugly stripes in.
Make sure you blend the edges of the stripes, not the middle. You need to keep the centre section matched with its opposing edge, or the whole point is lost.
And finally, the texture edge matching is done! Whoohoo! Now it's time to turn those clouds into leather. Leather isn't smooth, so we want to mess up those neat, smooth clouds. Add noise.
It doesn't matter which noise, just go to Filters->Noise and play with the different types of noise (you have an undo button) and see what looks interesting to you. If your noise adds coloured dots all over your lovely clouds, there's a fix for that. Colors->Desaturate. Brings it all back to black and white.
But those noise dots are too obvious. So back to Filters, and choose one of the lovely blur options. Repeat noise and blur until you're happy with how it looks, and think it looks kind of leather-y (but too grey).

So now we need to un-grey it. I use Colors->Color Balance and play with the sliders, but you can use any of the color-changing tools. Tint it whatever shade suits you: once again, this is art. Your personal choices are up to you.
And badda-bim, badda-boom, you have leather!
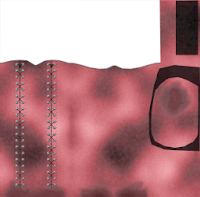
Once I had my leather, I decided where to put sewing seams for the leather, and put those in. Yes, I could have left 'sewn' bits un-matched. I chose not to, some people will choose to.
Then I picked the neckline for the top. I copied the leather in the shirts file to a new transparent layer and cut out the section for the neckline.
I re-used my grommets from the Brigid set for this set, and put them and some lacing at the 'fly' area of the pants, and down the front of the top. I painted in a 'gap' between the lacing, as well. I didn't want to leave it transparent, but it needed to have some sort of 'gap' there for the visual effect.
Then I made new layers and put lacing and grommets and a gap down for gloves and boots. I had the lacing, I had the seam-matched textures - I might as well. I had to re-seam-match the very hems of the pants, though, because I hadn't done a 'hem to shoe' texture match.
The boots were a nightmare! I wanted to have properly dark heels for the boots, but SL stretches the back of the foot down to make the heel. So I ended up deciding on the settings for the shoe sliders, and repeatedly uploading attempts at colouring the boot heel to the beta grid. I eventually had to get everything exactly right down to individual pixels, to avoid having great stretched 'boot' or 'heel' colours in the wrong part of the boot.

And then there's the top of the boots and the top of the gloves. Turns out that if you rely on the sliders to define the top of your boots or gloves, you get ugly mismatches. So I once again copied my leather to transparent layers, and cut out the tops of boots and gloves.
The other touch I've done for these outfits is an edge. Just a light semi-opaque dark brushing along all the edges: top of boots, top of gloves, the hems, and the top of the collar.


No comments:
Post a Comment